IKEA Hack – Turn a bed slat into a wall hanger
Wandaufbewahrung aus IKEA Lattenrost
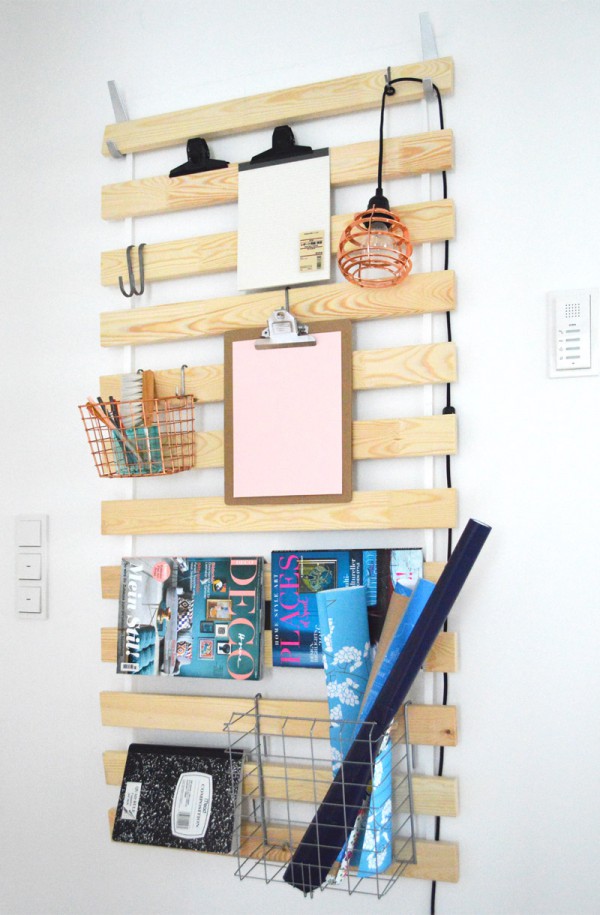
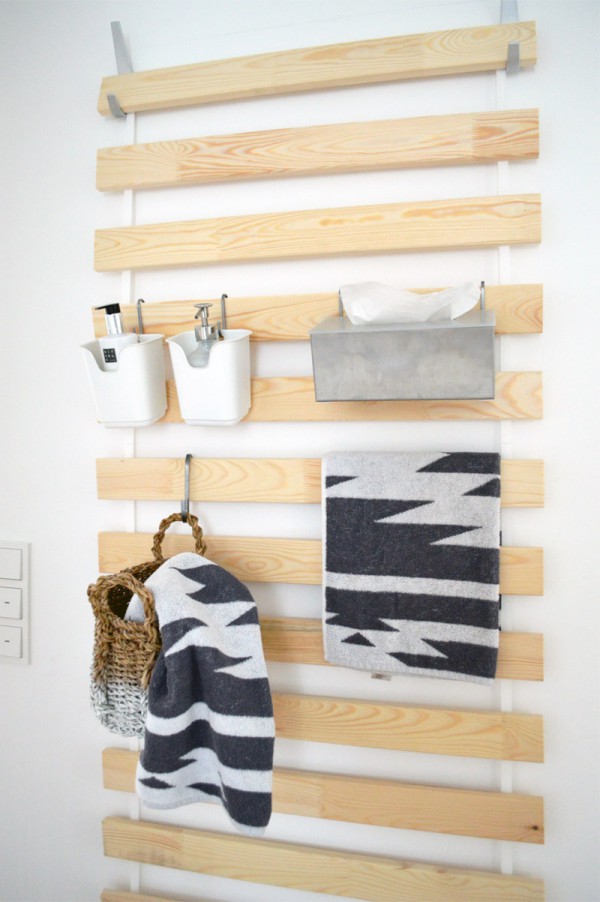
You probably recognize the Luröy slatted bed base from ikea.com if you own one of the Swedish retailer’s bed frames, since it’s usually located underneath a heavy mattress to add support. But instead of hiding this item, which features pieces of pine wood connected by two pieces of cloth, I transformed it into a stylish wall hanger with the help of two wall hooks.
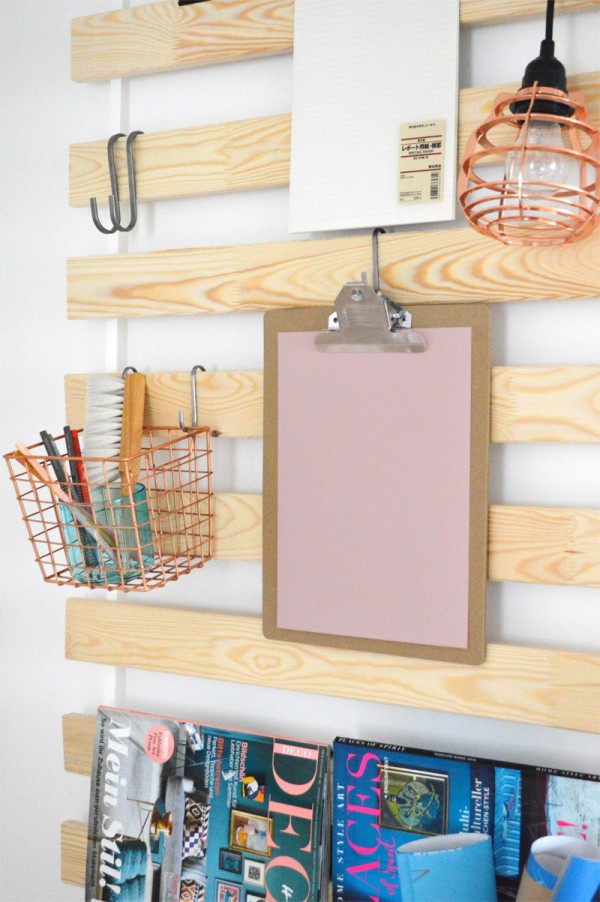
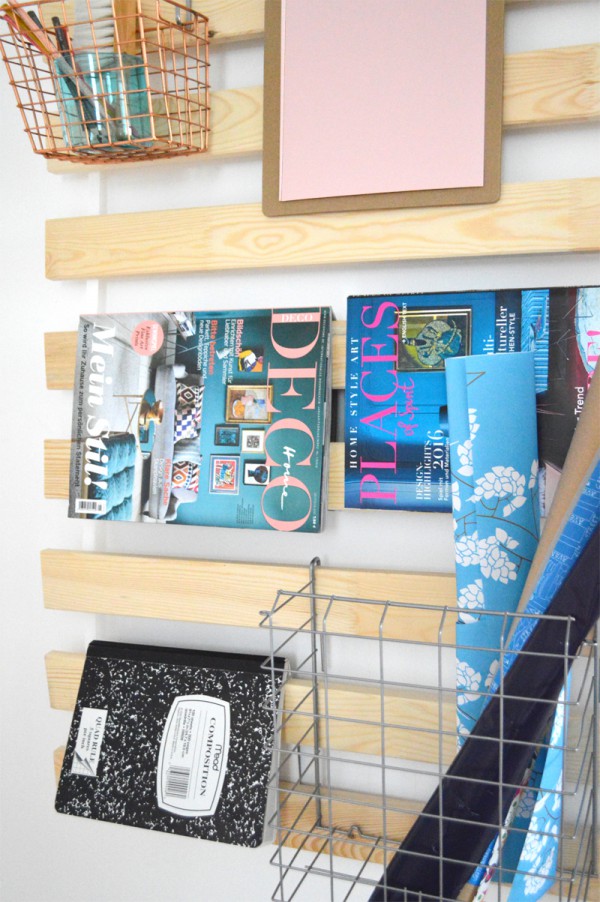
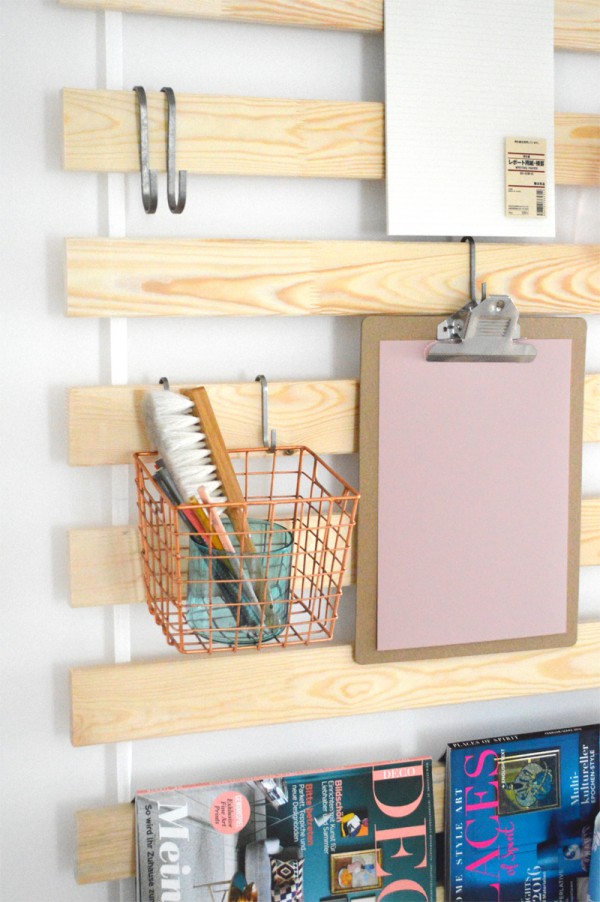
After securing to the wall, I use S-hooks to hang items on the wooden planks. In the kitchen that means pots filled with herbs, a clip board for recipes and a container full of cooking tools. Then, in the bathroom, I attach baskets stuffed with towels and in my office I drape magazines over the edges – no hooks required. Or I can use it to hold shoes. How surprisingly chic?
Follow me on Instagram to get more inspiration!
…
For my German readers / Für meine lieben deutschen Leser:
Du bist der festen Überzeugung, dass ein Lattenrost unter die Matratze gehört? Ich finde, wir sollten den Rost von seinem tristen Dasein erlösen und ihm einen ganz großen Auftritt verschaffen.
Mit nur zwei stabilen Wandhaken habe ich das Latterost an die Wand gehängt und kann ihn nun als praktische Aufbewahrung nutzen.
Solch ein Lattenrost findest Du entweder bei Ikea (Modell Luröy) oder bei Amazon und dort sogar in verschiedenen Größen.
S-Haken aus Edelstahl halten Körbe, Behälter, Kisten, Klemmbretter und vieles mehr fest. Sogar eine Milchkanne baumelt an meinem Lattenrost.
Das DIY gelingt Dir mit Sicherheit auch, wenn Du zwei linke Hände hast. Außerdem ist es eine wahre Low Budget Idee, denn mit 10 Euro für ein Lattenrost und etwa 10 Euro für Wand- und S-Haken schont es Deinen Geldbeutel.
Diesen IKEA Hack habe ich so ähnlich bereits vor 5 Jahren gepostet. Zufällig entdeckte ich kürzlich, dass meine Idee seitdem über tausendfach auf Pinterest geteilt wurde. Da meine fotografischen Qualitäten damals noch zu wünschen ließen, poste ich heute ein Remake. Und diesmal gleich mit vier verschiedenen Varianten für die Nutzung des Utensilos.
Mein Favorit: die Arbeitszimmer-Version. Die Latten sind ideal um Magazine daran aufzuhängen. Ein umgedrehter Drahtkorb hält Papierrollen im Griff. Und ein Klemmbrett und große Klemmen warten auf Notizen.
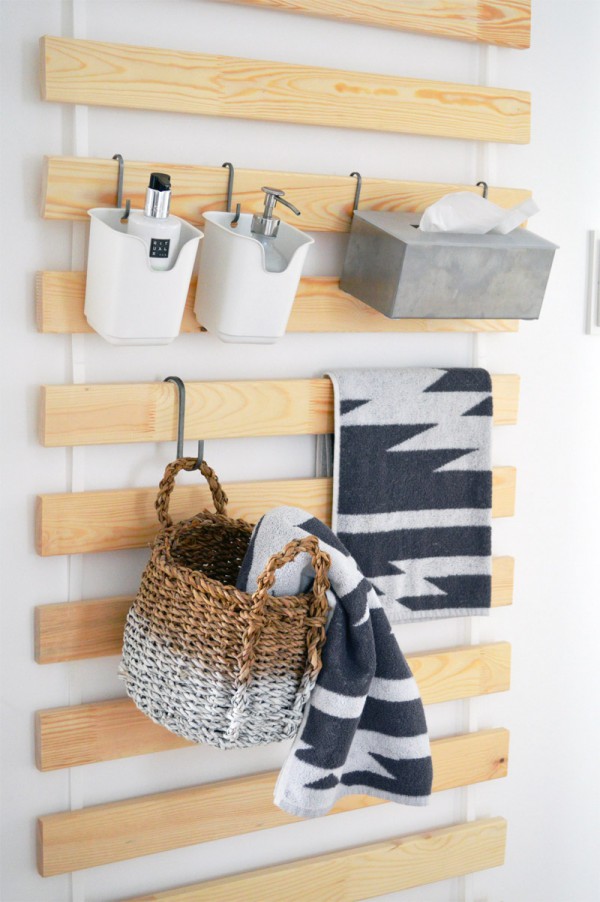
Auch im Bad macht das DIY Regal eine tolle Figur. Eine Kleenex Box und Metallbehälter sorgen für Ordnung und sind pflegeleicht. Ein Korb darf im Bad natürlich nicht fehlen. Ich bin ein Korb Freak und möchte nicht mehr ohne meine heiß geliebten Körbe leben. Diese hier finde ich ideal.
Vielleicht hast Du in Deiner Küche noch eine leere Wand? Dann häng doch einfach ein Lattenrost dran. Hier der Beweis, dass das super aussehen kann:
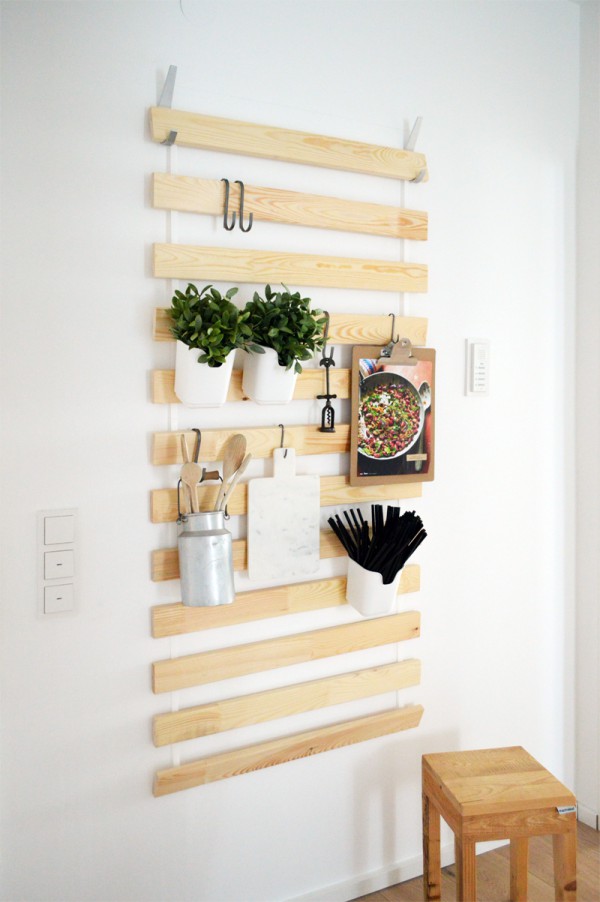
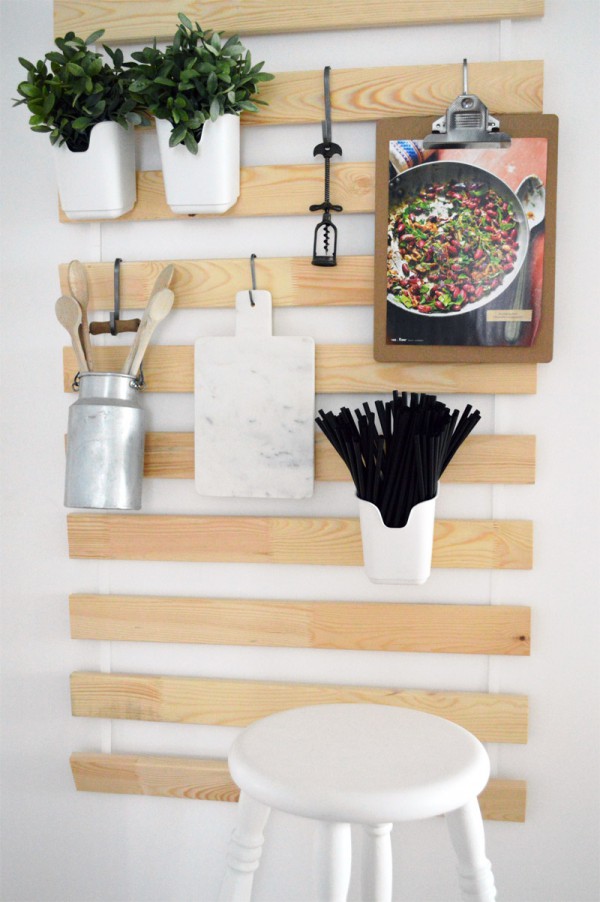
Kräutertöpfe, Milchkanne und Marmorplatte machen sich doch super an dem Lattenrost. Halt die Augen auf, denn auch Du hast bestimmt mehr Dinge, die sich aufhängen lassen, als Du denkst.
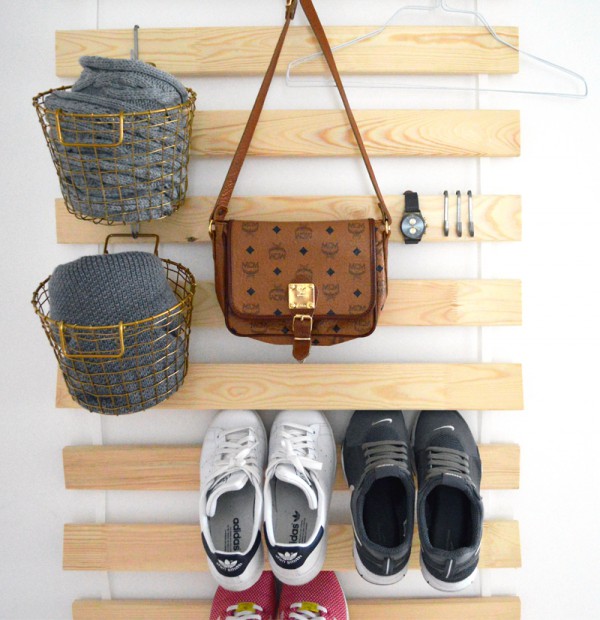
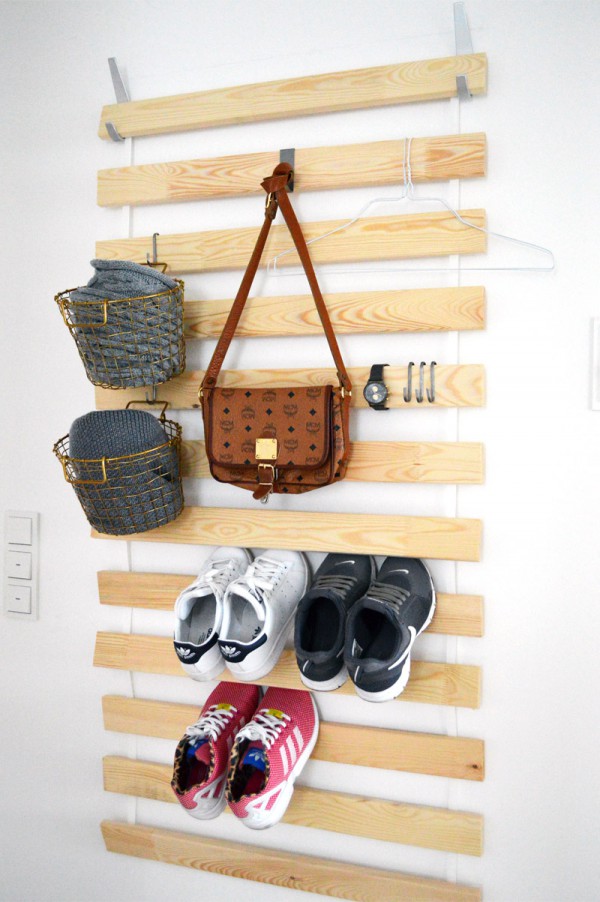
Selbst als Garderobe oder als Hingucker im Ankleidezimmer taugt die schlichte Bretterkonstruktion. Schuhe können ganz einfach zwischen die Latten geklemmt werden. Ein paar Messingkörbe von H&M Home halten Tücher und Schals fest. Uhren, Taschen und andere Accessoires finden natürlich auch ihren Platz.
Natürlich gibt es noch viele andere Einsatzmöglichkeiten für meinen IKEA Hack. Wie wäre es in der Waschküche oder auf Deinem Balkon?!
Ich bin neugierig, welche meiner Varianten Dir am besten gefällt?
Das Holz ist übrigens unbehandelt, so kannst Du es auch ganz einfach in Deiner Wunschfarbe lackieren. Viel Spaß beim Nachbauen.


Hi, ich hab deinen Hack umgesetzt und finde ihn an sich total cool.
Ich wollte den Lattenrost als Obst und Gemüse Bar verwenden, aber wenn ein kleiner Sack
Äpfel darin liegt, dann steht der Rost total ab.
Hast du da eine Idee??
Bei dir steht gar nichts ab.
Liebe Grüße
Hi Laura, freut mich, dass Dir die Idee gefaellt!
Wenn es absteht, befestige das Lattenrost doch weiter unten mit einer Schraube an die Wand.
Hoffe, das funktioniert.
Liebe Gruesse aus Kanada sendet Dir
Kristina
Hi, great DIY idea loved it and won a do a small one for a craft table.also loved the black and white towels you hang on it.where can I find those?
Thank you! The towels are from Ikea. Not sure if they are still available.
Prima Sache! Wir ziehen in 6 Wochen um und ich bin bei der Suche nach Eineichtungsideen über deinen Blog gestolpert. Der Lattenrost zieht auf jeden Fall mit ein, als Kräuterregal in der Küche oder Untensilo im Mal/Bastelzimmer…oder beides :-).
LG Silke
Das klingt ja super! Schick doch mal Bilder, wenn es fertig ist!
Hi, what wall hooks would you suggest using?
Hi Emily, I’ve found mine at IKEA. Just make sure that they are strong and big enough to hold the slat.
Übrigens: Es ist DER Lattenrost. – Auch bei Duden.. – Ansonsten: Super Idee!
Ohje, wie peinlich. Danke für den Hinweis Erico!
Bin auf der Suche nach Anregungen hier geladet. Den Hack kenne ich, würde ihn nun gern in die Tat umsetzen. Allerdings traue ich den zwei dünnen Bändchen, welche die Latten zusammenhalten, nicht so wirklich Last zu (z.B. als Gardarobe für Jacken & Taschen)?! Natürlich ist eine Stabile Aufhängung/Haken und richtige Schrauben wichtig, klar. Aber die Bändchen müssen ja auch die Last mittragen. Hast du die irgendwie verstärkt? Oder hast Du Erfahrungen, wie viel man wirklich dran hängen kann?
Danke und LG
Hallo Gabi, also wenn Du Ripsband verwendest oder diese dicken Plastikbänder (die oft bei Paletten verwendet werden) dann halten die schon so einiges aus. Tackere sie nur mehrfach auf der Rückseite fest. Eine Klammer ist zu wenig.
LG
Kristina
Hi! Do you have this blog translated into english? Im from Canada and have the bed base of a King Malm bed – looks very similar to this, have you ever tried this with the King Slats? love this ! so awesome !
Hi Paula, as I moved to Canada I am working on translating all blog posts in english. But it will take a while. Sorry.
I’ve never tried it with the King Slats. But why not?! It’t just double the size or you can cut it in a half.
One more question…thanks so much….my space is small…and this needs to be 27″ do you think it its adaptable?
thanks
Yes, why not…
Do you think this would be strong enough to hold coats?
Good Day…this could be just want i am looking for…do you think it would be strong enough for a coat rack?
Hi Molly, yes of course. Please make sure to use the right screws and anchors for your wall and for the weight.
Hi Kristina! I absolutely LOVE this ikea hack and wanna go for it. I’ve been looking at Ikea’s catalog online though and the luroy slate base (twin size – 96cm wide) seems to be a little bit curve and a little bit wider than this. What is the one you used for this project? Thanks for the great tips.
Hi Rute,
I’m glad you like it!
I used a slatted bed base from IKEA Germany. They are available in different sizes and they were not curved.
But I checked the slatted bases here in Canada (because I’m living in Canada now) and they are the same as you discribed it. You can use them as well.
But at the moment I am working on a new blog post about creating an own ’slatted base‘ to hang it on the wall. It is going to be a cheap and easy DIY:
Kristina
Hi Kristina! I absolutely LOVE this ikea hack and wanna go for it. I’ve been looking at Ikea’s catalog online though and the luroy slate base of the smallest size available (twin) seems to be a little bit curved and a little bit wider (96cm). Was that the one you used for this project? Thanks for the great tips.
I love this so much! I wonder the wood can be stained? What is the white part made of? Thank you for this great idea!
Hi Brandi,
Thanks! Of course it can be stained. The white part is a ribbon.
Best, Kristina
Greetings! I went to ikea last weekend and purchased the luröy version of the slats. I went to my local hardware store for wall hooks to mount it on the wall and I can’t find anything similar. What hooks did you use? Do you have any suggestions? Thank you!
Also, what about the hooks hanging off the the shelf itself?
Hi Hannah,
the hooks are all from IKEA (Grundtal S-Hook). The wall hooks are also from IKEA, but it seems they are not longer available.
Where are you from? Try it in a Home Depot. I already saw hooks like that here in Home Depot (Canada)
Best,
Kristina
Hello! I am from Canada and I am just looking for wall hooks to support the sleeper. Are you able to help me?
Hi I only speak english but i love what you created. What would i look for in ikea to ask for this? Thank you for the inspiration and advice!
Hi Gabriella,
Thank you, I’m glad you like my work. Ask for the cheapest slatted bed base. The current name of such a slatted bed base from IKEA is „Luröy“ (in Canada and USA).
Best,
Kristina
Liebe Kristina,
das sieht einfach super aus! Bis ich mal gerafft habe, dass es ein Lattenrost ist, hat schon etwas gedauert! 😉 Liebe Grüße, Kathrin
Ich finde die Idee so großartig!!
Das freut mich total! Danke und liebe Grüße
Tolle Idee. Habe ich Vorgestern dann mal als Garderobe im Flur umgesetzt. Allerdings finde ich die BLECKA-Haken etwas ausladend. Habe es mit den Haken aus der GRUNDTAL-Serie probiert (sehen wie Knöpfe aus). Dachte erst, die halten das Gewicht nicht, sitzen aber bombig. Als Haken zum Behängen eignen sich gut welche, die man sonst auf eine Tür aufstecken kann.
Was soll ich sagen? Vielen, vielen Dank für diesen tollen Hack. Bin sehr zufrieden mit meiner neuen Garderobe.
LG, Mathias
Hallo Matthias, freut mich sehr, dass Dir die Idee gefällt. Und danke für den Tipp mit den Grundtal Haken.
Viele Grüße Kristina
i love this, what materials were used ?
thanks
Hallo, ich schreibe Ihnen dies in Englisch und in Deutsch über Google übersetzen Übersetzen , so dass ich hoffe, es funktioniert! Ich frage mich, wo Sie die schwarzen und grauen Handtücher bekam ? Ich liebe sie!
Vielen Dank!
Hi Maggie, I bought the towels at H & M Home. I love them, too!
Tolle Idee! Kann man das Lattenrost auch kürzen, also Latten entfernen? Ich hab in der Höhe nur Platz von ca. 120cm..
Hallo Hennrike,
ja, dieses Lattenrost kann man problemlos kürzen. Das geht sogar mit einer Schere, da die Latten mit einem textilen Band verbunden sind. Habe mein Lattenrost so auch gekürzt.
Liebe Grüße
Kristina
I Love this! Great idea!
Superschöne Idee! Woher sind die weißen Aufbewahrungen, in denen die Pflanzen stehen?
LG, Jana
Hallo Jana,
danke! Die weißen Behälter sind aus Metall und auch von IKEA:
http://www.ikea.com/de/de/catalog/products/20233876/
LG
Kristina
hallo,
finde das sehr cool, dass du eine eigene rubrik mit ikea-hacks auf deinem blog hast und für den fall, dass du ab und zu nadel und faden in die hand nimmst: ich habe die ikea grundtal-dose gehackt und ein nähkissen draus gemacht :-).
https://julenaroth.wordpress.com/2014/10/13/diy-nadelkissen/
alles liebe
julena
Hallo Julena,
habe ich mir gerade auf Deinem Blog angeschaut. Total süße Idee. Zumal ich drei von diesen Dosen hier rumliegen habe ohne sie zu benutzen. Jetzt muss ich nur noch mit dem Nähen anfangen, kann ich nämlich nicht wirklich 🙁
Liebe Grüße
Kristina
Coole Sache. Könnte was für mein kleines Schlafzimmer sein …
Übrigens – das Foto in deinem Post von „damals“ ist doch garn nicht so übel. Aber es ist trotzdem schön, dass du an diese Idee neu anknüpfst.
LG vonKarin
Oh doch, das Foto bzw. den Post finde ich ganz übel 😀 aber wir haben ja alle mal klein angefangen….